Tired of settling for mediocre coffee while travelling? Fear not, fellow coffee enthusiasts! We've got you covered with "5 ways to brew coffee while travelling." In this blog post, we'll explore different coffee brewing techniques, from Aeropress to Turkish Pot, that will allow you to enjoy a perfect cup, no matter where your adventures take you.
Short Summary
Brew coffee on the go with an Aeropress, V60 filter cone, Moka pot or French Press.
Make strong espresso-like coffee in a Turkish Pot using a cezve or small saucepan.
Easy steps to make delicious café quality cup of joe wherever you are!
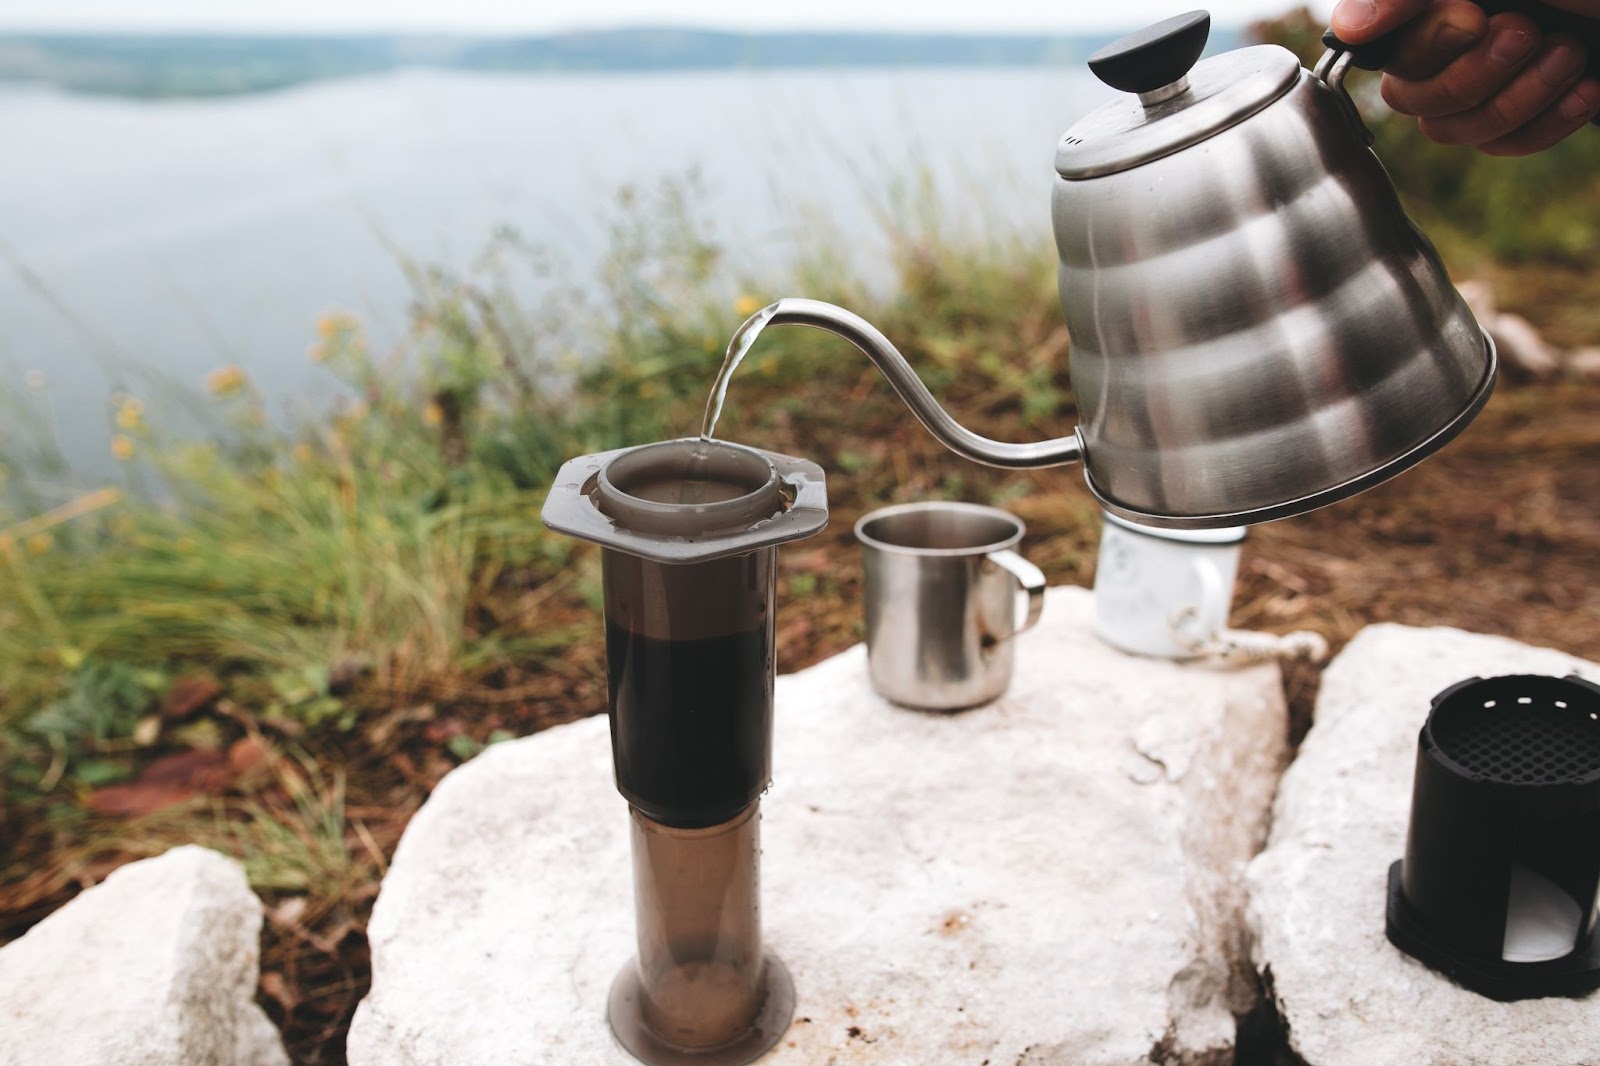
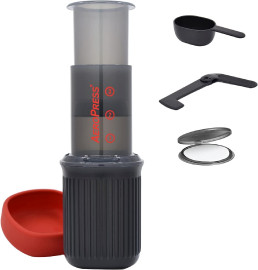
1. Aeropress
The Aeropress is a fantastic, portable coffee maker that can accompany you wherever you travel. It uses manual pressure to produce a rich and smooth cup of coffee in just four minutes.
Say goodbye to bad coffee while traveling and hello to the taste of your favorite coffee shops!
Aeropress Go
The Aeropress Go is a lightweight, plastic cylinder with a plunger and paper filter, perfect for making coffee on the go. The Go model comes with a filter cap, fold-up stirrer, clamshell-style filter holder (holding 20 filters), scoop, 350 filters, lid, and mug. This brilliant coffee gadget is about the size of a travel mug, making it perfectly portable and easy to use. It's a great alternative to a drip coffee maker when you're on the go, and it's also suitable for those who love espresso but don't have access to an espresso machine.
Using the Aeropress. Go is simple: toss your coffee grounds into the chamber, add hot water, give it a stir, and press the plunger down for coffee extraction. Within minutes, you'll have a great cup of coffee that rivals any coffee shop brew.
So, say goodbye to instant coffee and hello to the smooth texture and lovely deep richness of freshly brewed coffee, even while travelling!
Steps to make coffee in Aeropress while travelling
Ingredients and Equipment:
Aeropress brewer
Aeropress filters
Freshly ground coffee (medium-coarse grind) - about 15-18 grams (1 to 1.5 tablespoons) per cup
Hot water - around (93-96°C)
Coffee mug or thermos to brew into
Step-by-Step Guide:
1. Boil Water:
Heat water to the desired temperature (around 200-205°F or 93-96°C). If you don't have a thermometer, simply let the water boil and then let it sit for about 30 seconds to a minute to reach the ideal temperature.
2. Prepare Aeropress:
Assemble your Aeropress by placing a paper filter in the filter cap. Rinse the filter with hot water to eliminate any paper taste and preheat the Aeropress. Discard the rinse water.
3. Add Coffee:
Place the Aeropress on a sturdy mug or thermos with the plunger pushed all the way in. Add the ground coffee to the Aeropress chamber. For one cup of coffee, use approximately 15-18 grams (1 to 1.5 tablespoons) of coffee.
4. Blooming Step:
The blooming step is crucial for a well-balanced cup of coffee. Start the timer and pour just enough hot water (about double the weight of the coffee, so 30-36 grams or milliliters) onto the coffee grounds to saturate them completely. This initial pour allows the coffee to release gases trapped during the roasting process. The coffee grounds will puff up and rise slightly during this step.
5. Stir the Bloom:
Using the provided stirrer or a long spoon, gently stir the blooming coffee slurry to ensure even saturation. This helps all the coffee grounds come into contact with water, ensuring a more consistent extraction.
6. Complete Water Addition:
After about 30 seconds of blooming, continue pouring the remaining hot water into the Aeropress, filling it up to the top. Be careful not to overfill it, leaving a little space at the top to avoid spillage.
7. Stir Again:
Give the coffee another gentle stir to make sure all the coffee grounds are evenly exposed to water, promoting consistent extraction.
8. Attach Filter Cap and Plunge:
Place the filter cap on top of the Aeropress and start pressing down gently but steadily. The plunger should take about 20-30 seconds to reach the bottom.
9. Clean-Up:
Once the plunger is fully pressed, unscrew the filter cap and push the coffee puck and used filter into a trash bag or container. Rinse the Aeropress thoroughly with water.
10. Enjoy:
Your coffee is now ready to drink! If desired, you can dilute it with hot water or add milk and sugar to suit your taste preferences.
Estimated Time:
The entire Aeropress brewing process, including blooming, should take approximately 3-4 minutes, depending on your pace and experience. The blooming step itself usually lasts around 30 seconds.
By allowing the coffee to bloom and then stirring it, you ensure a more even extraction and enhance the flavor and aroma of your coffee, resulting in a more satisfying cup.
If you prefer French press coffee, consider using a travel French press option instead.
2. V60/ Filter Coffee
For those who prefer pour-over coffee, the V60 or filter cone is an excellent choice. This brewing method provides control over the entire process and is portable, easy to use, and can brew coffee for multiple people.
With the V60, you can truly taste all the subtle notes in your coffee.
Steps to make coffee in V60 while travelling
To make coffee using the V60 while traveling, follow these steps:
Ingredients and Equipment:
V60 pour-over dripper
V60 paper filters
Freshly ground coffee (medium-coarse grind) - about 15-18 grams (1 to 1.5 tablespoons) per cup
Hot water - around (93-96°C)
Coffee mug or thermos to brew into
Kettle or a vessel to heat water
Step-by-Step Guide:
1. Boil Water:
Heat water to the desired temperature (around 200-205°F or 93-96°C) using your kettle or a vessel. If you don't have a thermometer, bring the water to a boil and then let it rest for about 30 seconds to a minute to reach the ideal temperature.
2. Prepare V60 and Rinse Filter:
Place the V60 dripper on top of your coffee mug or thermos. Fold the paper filter along the seam and place it inside the V60. Rinse the filter with hot water to eliminate any paper taste and to preheat the brewing equipment. Discard the rinse water.
3. Add Coffee:
Add the freshly ground coffee to the center of the V60 paper filter. For one cup of coffee, use approximately 15-18 grams (1 to 1.5 tablespoons) of coffee.
4. Bloom the Coffee:
Start the timer and pour just enough hot water (about double the weight of the coffee, so 30-36 grams or milliliters) onto the coffee grounds to saturate them entirely. This is the blooming step, which allows the coffee to release gases and initiate the brewing process. Let it bloom for about 30 seconds.
5. Begin the Pour:
After the 30-second bloom, start pouring hot water in a circular motion, starting from the center and moving outward, wetting all the coffee grounds evenly. The water level should be maintained just below the rim of the V60 to prevent overflows.
6. Brew Time:
The total brew time will depend on factors like grind size, pour rate, and coffee bean characteristics. Generally, aim for the total brew time to be around 2.5 to 3.5 minutes.
7. Pour Gradually:
As the water level in the V60 decreases, continue pouring hot water in a slow, steady, and circular manner. Try to maintain a consistent pour rate to ensure even extraction.
8. Let It Drip:
Once you've poured all the water, allow the remaining water to drip through the coffee grounds fully. The coffee bed should be relatively flat at the end of the brewing process.
9. Serve and Enjoy:
Once the dripping stops, remove the V60 dripper from your mug or thermos, and your coffee is ready to be enjoyed.
Estimated Time:
The entire V60 pour-over brewing process, from blooming to serving, should take approximately 3-4 minutes, depending on your pouring technique and grind size.
Remember to pack your V60 dripper, filters, and coffee beans in a secure and compact travel kit, and you'll be able to make fantastic pour-over coffee wherever your travels take you!
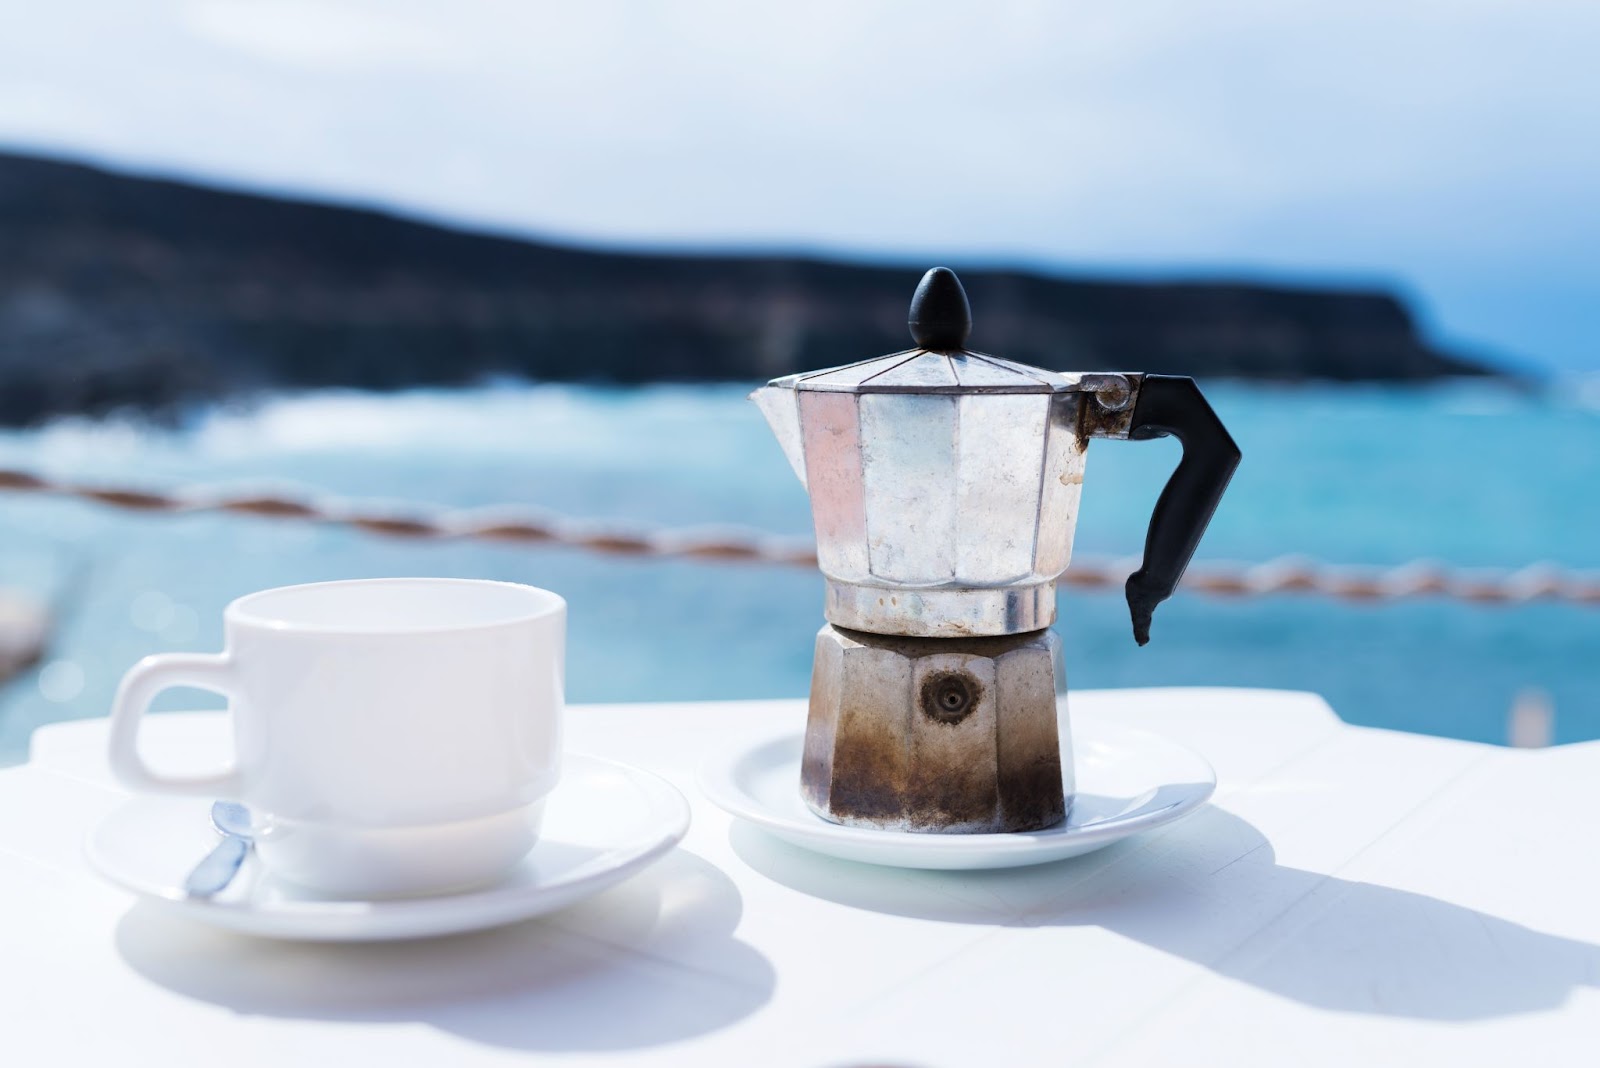
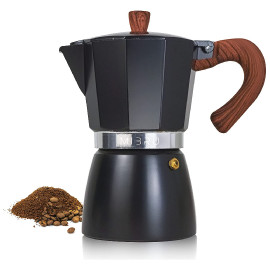
3. Moka pot
For those who enjoy strong, espresso-like coffee, Moka pots and percolator pots are excellent stovetop coffee makers to consider. These devices come in various sizes, with the Moka pot having a top chamber for brewed coffee and the percolator pot allowing the coffee to cycle through the grounds until taken off the heat.
Steps to make coffee in a Moka pot while travelling
To make coffee using a Moka pot while traveling, follow these steps:
Ingredients and Equipment:
Moka pot (also known as a stovetop espresso maker)
Freshly ground coffee (medium-fine grind) - about 15-18 grams (1 to 1.5 tablespoons) per serving
Hot water
Stove or portable heat source
Coffee mug or thermos to serve
Step-by-Step Guide:
1. Boil Water:
Begin by heating water separately in a kettle or any suitable vessel. You'll need enough water to fill the Moka pot's water chamber.
2. Assemble Moka Pot:
Take the Moka pot apart into three pieces: the bottom chamber (where the water goes), the middle filter basket (where the coffee grounds go), and the top chamber (where the brewed coffee collects). Ensure the rubber gasket and metal filter are clean and in place.
3. Add Coffee Grounds:
Fill the filter basket with freshly ground coffee. For one serving, use approximately 15-18 grams (1 to 1.5 tablespoons) of coffee. Level the coffee grounds but avoid compacting them.
4. Fill Water Chamber:
Pour the heated water into the bottom chamber of the Moka pot. Fill it up to just below the pressure valve or the fill line indicated inside the chamber.
5. Assemble Moka Pot:
Place the filter basket filled with coffee grounds onto the bottom chamber, then screw on the top chamber securely.
6. Heat the Moka Pot:
Place the Moka pot on a stove or portable heat source over medium heat. Make sure the handle is not directly above the flame or heat source to avoid damage. Close the lid.
7. Brew Time:
The water in the bottom chamber will boil, creating pressure that pushes the water through the coffee grounds and into the top chamber. This process usually takes 4-5 minutes. You'll hear a hissing sound when the brewing is almost complete.
8. Remove from Heat:
Once the coffee has filled the top chamber, carefully remove the Moka pot from the heat source. Be sure to use an oven mitt or towel, as the Moka pot will be hot.
9. Serve and Enjoy:
Stir the brewed coffee gently before pouring it into your coffee mug or thermos. You now have a rich, flavorful coffee ready to be enjoyed!
Estimated Time:
The entire process of making coffee with a Moka pot should take around 10-15 minutes, including the time to heat water and brew the coffee.
The Moka pot is a versatile and portable coffee maker that doesn't require any electricity, making it an excellent choice for travelers who want to enjoy a strong and delicious cup of coffee wherever they go.
Enjoy your strong, espresso-like coffee that provides a more intense caffeine hit.
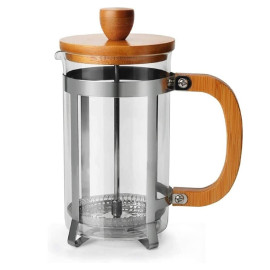
4. French Press
A travel French Press combines a French Press and a travel mug, allowing you to brew coffee on the go. With a lid that features a drinking spout, you can easily enjoy a rich cup of coffee without the need for additional mugs or cups.
This type of French Press is perfect for those who are always on the go and need a quick and easy way to make coffee. It is also great for those who want to enjoy a cup of coffee.
Steps to make coffee French press while travelling
To make coffee using a travel French Press while traveling, follow these steps:
Ingredients and Equipment:
French press (choose a size suitable for your needs)
Freshly ground coffee (coarse grind) - about 15-18 grams (1 to 1.5 tablespoons) per cup
Hot water - around (93-96°C)
Coffee mug or thermos to serve
Step-by-Step Guide:
1. Boil Water:
Heat water to the desired temperature (around 200-205°F or 93-96°C) using a kettle or any suitable vessel. If you don't have a thermometer, bring the water to a boil and then let it rest for about 30 seconds to a minute to reach the ideal temperature.
2. Add Coffee Grounds:
Measure the desired amount of freshly ground coffee into the French press. For one cup of coffee, use approximately 15-18 grams (1 to 1.5 tablespoons) of coffee. Adjust the quantity based on the number of cups you want to make.
3. Add Hot Water:
Pour the heated water over the coffee grounds in the French press. Start with just enough water to saturate the coffee grounds fully. This is known as the "bloom" step. Allow the coffee to bloom for about 30 seconds.
4. Stir and Complete Water Addition:
After the 30-second bloom, give the coffee a gentle stir to ensure all the grounds are fully saturated. Then, gradually pour the remaining hot water into the French press, filling it up to your desired volume.
5. Steep Time:
Place the plunger and lid on the French press but do not press it down yet. Let the coffee steep for about 4 minutes. This steeping time allows the coffee to extract its flavors from the grounds.
6. Press and Pour:
After the 4-minute steeping period, slowly press down the plunger, using steady and gentle pressure. The plunger will separate the coffee grounds from the liquid, leaving you with a flavorful coffee concentrate.
7. Serve and Enjoy:
Pour the brewed coffee into your coffee mug or thermos. If you prefer a milder taste, you can dilute the coffee with hot water or add milk and sugar to suit your taste preferences.
Estimated Time:
The entire French press brewing process should take approximately 5-7 minutes, depending on the steeping time and your preferred brewing strength.
The French press is a portable and reliable method for making coffee while traveling, as it requires only hot water and the French press itself. Remember to clean the French press after use, and it will be ready for your next coffee-making adventure!
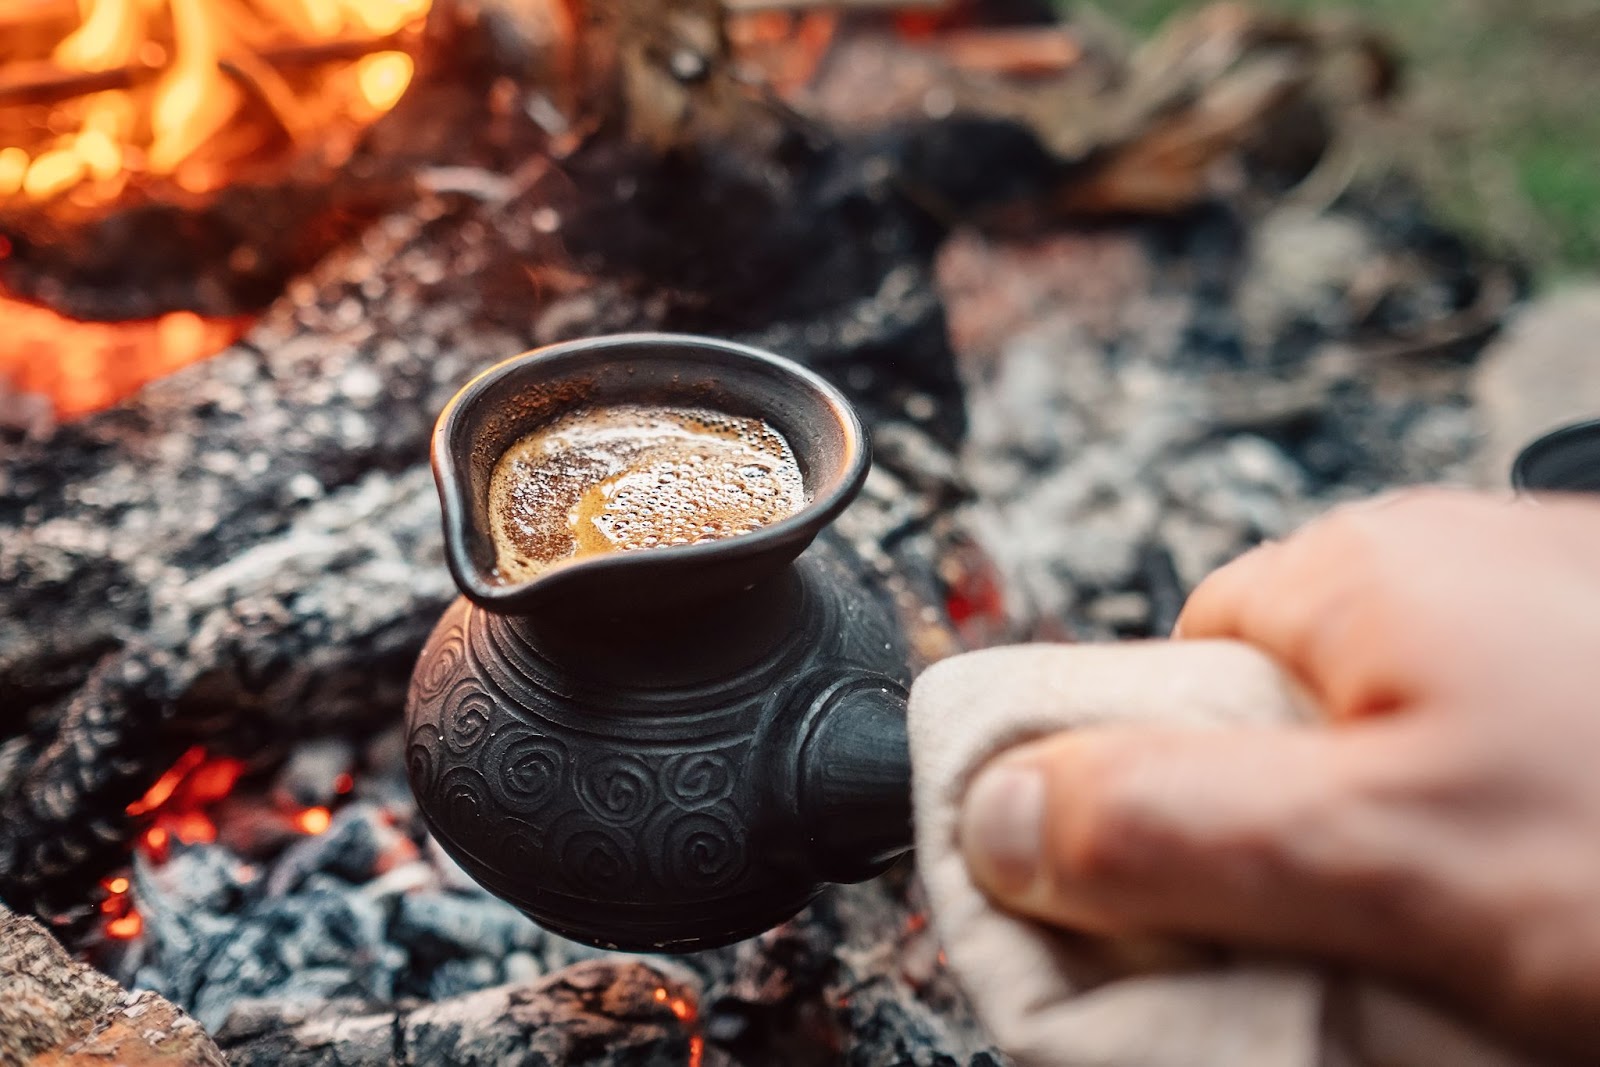
5. Turkish Pot Technique
The Turkish Pot Technique is an ancient brewing method that produces strong coffee using a cezve, a small copper or brass pot. This technique is perfect for those who enjoy a more robust and flavorful coffee experience.
It can be made using any small saucepan.
Steps to make coffee in a Turkish pot while travelling
To make coffee using the Turkish Pot Technique while traveling, follow these steps:
Ingredients and Equipment:
Freshly ground coffee beans (finely ground, similar to powdered sugar)
Optional: Sugar or spices (e.g., cardamom) to taste
Measurements (for one cup of Turkish coffee):
1 cup of water (approximately 240ml or 8 ounces)
1 heaping tablespoon of finely ground coffee per cup
Brew Time:
Approximately 4-5 minutes
Step-by-Step Guide:
Measure the water: Using a measuring cup, measure one cup (approximately 240ml or 8 ounces) of water per serving you wish to make. Pour the water into the Turkish coffee pot (cezve or ibrik).
Add coffee and optional sugar/spices: For each cup of coffee, add one heaping tablespoon of finely ground coffee into the pot. If you prefer your coffee sweetened or with spices like cardamom, you can add sugar or a pinch of spices to taste at this point.
Mix the coffee: Use a small spoon to stir the coffee grounds gently in the water. This helps to evenly distribute the coffee and sugar/spices if you added any.
Place the pot on the heat source: Set the Turkish coffee pot on a low to medium-low heat source. Traditionally, Turkish coffee is prepared over hot sand or a low flame, but when traveling, you can use a gas stove, portable camping stove, or any other suitable heat source.
Brew the coffee: Allow the coffee to slowly heat up. As it starts to warm, you will see a foam layer forming on the surface. Be patient and keep the heat low to prevent boiling or burning the coffee. The foam is an essential part of Turkish coffee and adds to its flavor and texture.
Foam and Brew: Once the foam forms and rises to the top, you can divide it into the cups evenly. Continue brewing the coffee on low heat, making sure it doesn't boil over.
Continue brewing: As the coffee continues to brew, you will see the foam rise again. Be cautious and avoid letting it boil over. Turkish coffee is typically brewed for about 4-5 minutes in total, but you can adjust the time according to your preference for strength.
Pour the coffee: After the total brewing time, pour the coffee slowly into the cups, making sure to distribute the foam evenly among them.
Serve and enjoy: Turkish coffee is traditionally enjoyed slowly, savoring its rich taste and aroma. Remember, the grounds settle at the bottom, so it's better to let it sit for a moment before drinking.
Enjoy the robust and flavorful cup of coffee that can be savored anywhere, even while traveling.
In conclusion, there are numerous ways to brew coffee while travelling, ensuring that you can enjoy a perfect cup no matter where your adventures take you. Whether you prefer the convenience of an Aeropress, the control of a V60, the intensity of a Moka pot, the simplicity of a French Press, or the robust flavor of a Turkish Pot, there's a method for every coffee lover. So pack your bags, and don't forget your coffee gear – adventure and great coffee await!
Frequently Asked Questions
How do you have good coffee when traveling?
When traveling, you can make sure you enjoy the best possible coffee by investing in an AeroPress, V60/filter cone, Moka Pot/Percolator Pot, travel French Press, or Turkish Pot.
Make sure to invest in one of these options and you'll have great coffee no matter where you go!
How do you make coffee on a road trip?
Brewing coffee while on the road doesn't have to be complicated. With a few options like the AeroPress, V60 filter cone, Moka Pot, Travel French Press or Turkish Pot, you can make a delicious cup of coffee right on your road trip.
No matter which method you choose, you'll need some basic supplies like a kettle, coffee beans, a grinder, and a mug. With these items, you are able to use these items.
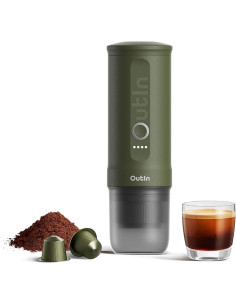
How do you make coffee in a car?
Brewing coffee in the car has never been easier! Simply plug your coffee maker into the cigarette lighter, add water and grounds or pods of your choice, turn it on, wait for the signal indicating your coffee is ready, and enjoy.
It's that easy!
How do you make cold brew when traveling?
When travelling and looking to make cold brew, it's easiest to use a French press - just mix ground coffee and water in the beaker and don't push down the lid yet.
When you're ready to enjoy your cold brew, strain the grinds by pushing down the lid and plunger. Enjoy!
 Fellow Ode Coffee Grinder Repair After Grinding Cascara | Practical StepsRead more
 WPM Primus Update Guide – Version 46EU: Enhancing Water Flow ControlRead more
 Espresso Machine Pump Comparison: Vibratory vs Rotary vs Gear PumpRead more
 Coffee in Arabic and World LiteratureRead more
 Espresso machine cleaning schedule and How to do itRead more
 How to Brew The Perfect V60: Common Problems And How To Solve ThemV60 Coffee is considered one of the best-selling items in specialty cafes, it is a way for the barista to show off...Read more
 What’s the Difference Between the V60 and the ChemexThe V60 and the Chemex are probably the two most popular pour-over brewing methods worldwide. Almost every cafe that...Read more


Leave a comment