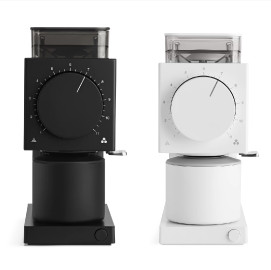

Home coffee grinding is an enjoyable daily ritual, but what if it turns into a technical disaster? In this video from Qavashop, we reveal how grinding coffee cascara (coffee cherry husks) can completely disable even the finest grinders. In this comprehensive guide, we take you through a practical journey to rescue the Fellow Ode Gen 2 grinder and restore it to working condition.
Watch: Rescuing the Fellow Ode Gen 2 grinder from a complete clog
Watch a practical walk-through step by step to unclog and clean the Fellow Ode Gen 2:
Why Is Grinding Cascara a "Fatal Mistake"?
Professional coffee grinders are designed exclusively for grinding solid coffee beans, but cascara has completely different properties:
The Doubled Danger: Moisture
When cascara is sprayed with water (RDT technique), it becomes a sticky substance that completely seals the burrs and the coffee outlet, requiring surgical intervention on the grinder!
Repair Guide: Rescuing Fellow Ode in 4 Steps
Important Warning Before Starting
If you're not confident in your technical expertise, DO NOT attempt the repair yourself!
Incorrectly disassembling the grinder can lead to:
Permanent damage to the burrs or motor
Complete warranty void
Repair costs could be higher than the original price
Optimal Solution: Consult a specialized technician experienced in coffee grinder maintenance.
Step 1: Disassembly and Initial Diagnosis (5 minutes)
Required Tools:
Compatible screwdriver for your model
Gloves (optional)
Steps:
Completely disconnect the grinder from electricity
Press the release button to pull out the upper burr
Visually inspect: Are the husks clumped? Is there moisture?
Tip: If the husks are wet, let the burr dry for 10 minutes before cleaning.
Step 2: Deep Cleaning (10 minutes)
a) Cleaning the Upper Burr:
1. Compressed Air Blower:
Start with strong blowing to remove surface debris
This reveals the "real condition" of the burrs
2. Manual Removal:
Use a thin metal tool (tweezers or a metal toothpick)
Important Warning: Don't touch the sharp burr edges directly - clean only AROUND the burrs
3. Outlet Clearing:
Inspect the ground coffee exit hole
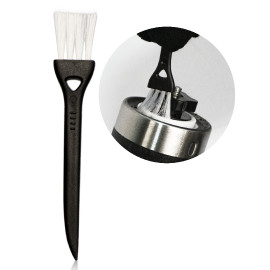
Remove clumps with an old toothbrush or wooden stick
b) Cleaning the Lower Burr:
Repeat the same previous steps
Ensure removal of ALL cascara residue
Step 3: Reassembly (3 minutes)
Return the lower burr to its place until hearing a "click" sound
Install the upper burr, aligning the marks
Ensure all parts are secure
Step 4: Zeroing and Calibration (2-5 minutes)
What Is Zeroing and Why Is It Necessary?
Zeroing (Calibration) is the process of resetting the distance between the upper and lower burrs to be at the most precise point possible - the point where the burrs almost touch without actual friction.
Why is it crucial?
Ensures grind accuracy at all levels (coarse → fine)
Prevents burr wear from unbalanced friction
Maintains particle size stability (consistency)
Extends grinder's lifespan overall
When should you zero?
After any deep disassembly and burr cleaning
When noticing differences in grind quality despite the same settings
When hearing unusual friction sounds
Every 6 months as routine maintenance (even without cleaning)
Critical Step: Without proper zeroing, the grinder may grind unevenly.
Zeroing Method:
Turn the grind dial to the finest setting (counterclockwise)
Continue until hearing slight friction (burrs touching)
Turn the dial back half a notch
Test with a small amount of coffee
Note: Zeroing method varies by model - consult your grinder's user manual.
Prevention is Better Than Cure: 5 Golden Rules
Rule 1: Don't Mix Types
Use a separate grinder for cascara or spices
Cheap blade grinders are better for cascara than professional burr grinders
Rule 2: Control Moisture
If using RDT (water spraying), use only ONE spray
Dry beans with a towel before grinding
Rule 3: Regular Cleaning
Daily: Quick air blow after use
Weekly: Brush cleaning
Monthly: Disassembly and deep cleaning
Rule 4: Monitor Early Signs
Slow coffee exit
Unusual friction sounds
Variation in grind coarseness
Rule 5: Use Cleaning Pellets
Urnex or Cafetto grinder cleaning pellets remove accumulated oils
Use once every two months
Recommended Maintenance Schedule
Frequently Asked Questions
1. How do I know if the burr is damaged from clumps?
Inspect after cleaning:
Healthy: Sharp and even edges, no scratches
Damaged: Deep scratches, uneven edges, inability to calibrate
2. Can I use water to clean the burrs?
Never! Water causes metal burrs to rust. Use only compressed air, a dry brush, or a microfiber cloth.
3. What if calibration fails after cleaning?
This means one of two possibilities:
Not all clumps removed → Repeat cleaning
Burr damage → Contact technical support or replace the burr
4. Are cleaning pellets safe for monthly use?
Yes, but:
Use according to package instructions
Grind 10g of coffee afterwards to remove residue
Don't use it as a substitute for manual cleaning
5. When should I replace the burrs completely?
Replace them if:
You notice deep scratches affecting the grinding
After 3-5 years of intensive daily use
Inability to calibrate despite cleaning
Conclusion: Your Grinder Deserves Care
A professional coffee grinder is a long-term investment, and caring for it takes no more than a few minutes a day. Remember:
Don't grind cascara and spices in professional coffee grinders
Clean regularly before problems appear
Zero regularly to maintain quality
Question for Readers: Have you ever faced a similar situation? Share your experience in the comments below!